Redstone Clock Circuits
On this page you will see some of the basic circuits that you can adapt to do almost anything you might want to with Redstone.
Clocks (sometimes called oscillators, or timers) are circuits that generate a regular pulse. Clocks are commonly used to repeatedly activate a device, such as a piston or dispenser.
Repeater clock
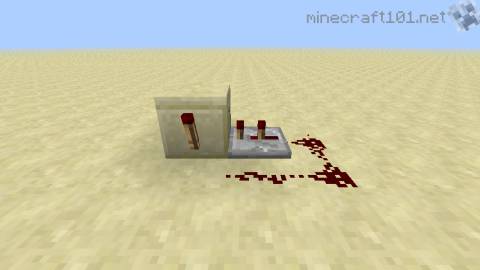
This is a very simple circuit: it consists of a redstone torch and a repeater.
The signal from the torch is fed back around to the block the torch is connected to, meaning that when the torch is lit, it switches itself off, which allows it to come back on, which switches it off and so on.
The repeater introduces a delay, to set the timing of the clock. In fact, without the repeater, the circuit would tick so fast that the torch would burn out. When making the clock, place the repeater before you finish the other wiring, and right click at least once to set a delay of 0.2 seconds (this is the fastest clock the torch can handle).
Controlling the timing
Add more repeaters: each one provides 0.1?0.4 seconds of delay depending on how you set it.
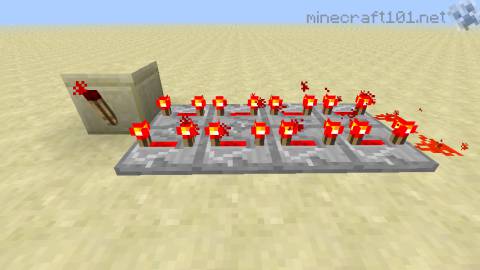
With 8 repeaters, each set to 0.4 seconds delay, this clock will be on for 3.2 seconds, then off for 3.2 seconds, then on again.
Using a clock to control a device
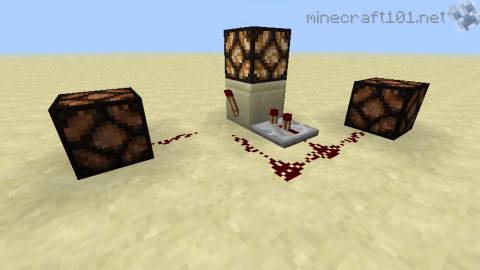
To control a device such as a piston or dispenser, just use redstone wire to connect any part of the clock circuit to the device.
Switching the clock on and off
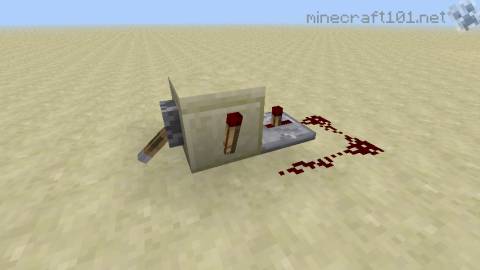
The clock can be stopped from ticking by supplying a signal that keeps the redstone torch switched off.
The best way to do this is to send the signal to the block the redstone torch is attached to, as with the lever in the above picture. The signal could also be the output from another circuit, of course, such as a daylight detector or comparator.
Alternate design
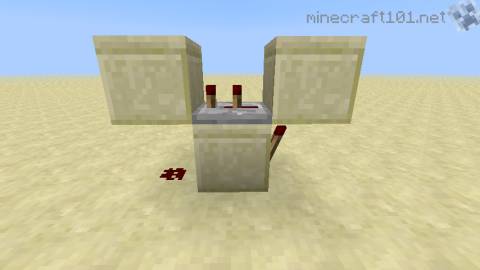
This is another clock that works the same way, but may fit better in small spaces.
Examples
A clock is used to control the movement of items in our dropper elevator tutorial.
The firework launcher on the fireworks page is a clock incorporating a dispenser.
Hopper Clocks
Sometimes you want longer ticks than are easily achieved with redstone repeaters. For this, you can take advantage of the time it takes items to be moved from one place to another by a hopper.
Here are some clocks built on this principle:
Two-stroke hopper clock
Two hoppers placed facing one another will transfer items back and forth. Normally they will just ping-pong one item back and forth very rapidly, but what if we told them to wait until they have all the items before transferring them back? We would have a clock whose period was controlled by the number of items the hoppers were passing back and forth.
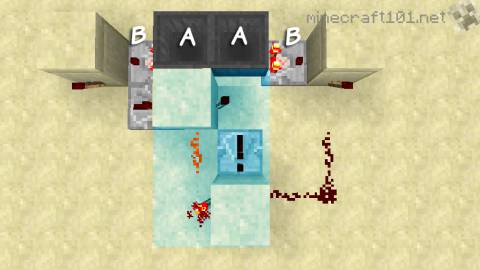
We will use comparators to detect when a hopper is empty. Each time a hopper is emptied, this will switch the state of an RS-NOR latch that controls the hoppers.
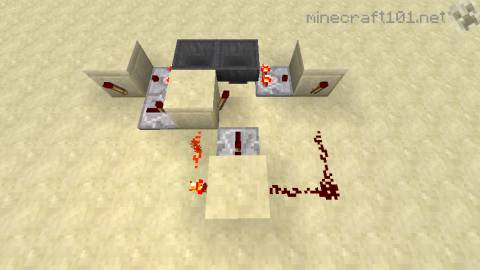
Two hoppers are placed facing one another (A). Next to them are placed comparators (B). Because we want a signal from these when the hoppers are empty, the signal is inverted before being fed into a typical RS-NOR latch (the blue area.
Placing hoppers
To place the two hoppers facing each other: first, place a hopper against the side of a block, then destroy the block and place the second hopper against the side of the first.
Controlling the timing
Each item you add to the hoppers will increase the period by 0.7 seconds, up to a maximum of 3 minutes 44 seconds for 320 items (5 stacks of 64). 86 items will give a period of about a minute.
Pausing the clock
Supplying power to either hopper will stop the clock at the end of the next cycle. Supplying power to both hoppers will pause the clock right now (you can even count the items in each hopper to work out how much time elapsed).
Taking an output
There are a few good places where you can wire up the clock to the devices you want to control with it.
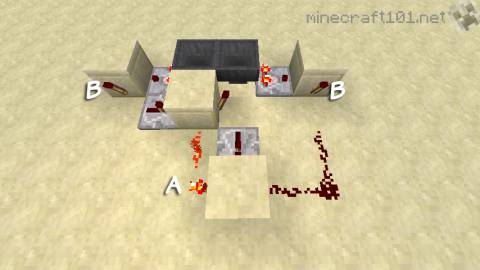
The RS-NOR latch path of the circuit (A) is ON half the time, off half the time. The signals from the comparators (B) give a brief tick once each cycle.
Compact 2-stroke hopper clock
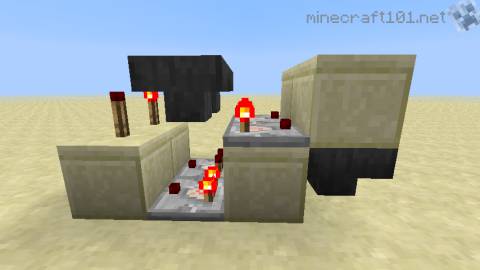
This design works on the same principle as the one above, but it uses two pairs of hoppers: one to control the timing, and the other to function as an RS-NOR latch.
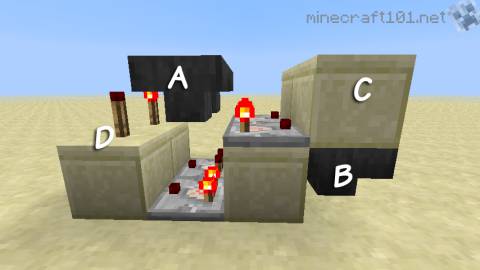
The top hoppers (A) control the timing: place up to 5 stacks of items in here. The lower hoppers (B) function as an RS-NOR latch. Place a single item in here. When one of the timer hoppers becomes empty, it unlocks the corresponding latch hopper, allowing it to accept the item, starting a new clock cycle.
As before, you can get a short pulsed output each time the cycle is completed (from the blocks marked C) or a continuous on-half-the-time, off-half-the-time signal from the blocks marked D).
Rotary hopper clock
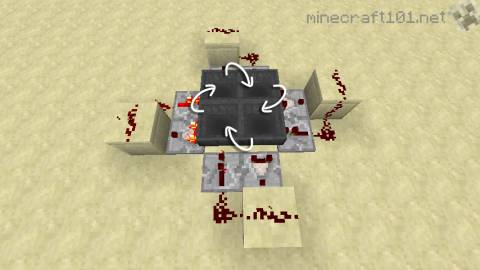
Another hopper clock design uses a circular arrangement of hoppers that all feed into one another. This allows for much longer clock times.
The arrows show the direction items move from one hopper to the next. Each hopper has a comparator that sends a message to the hopper in front of it saying "wait for me to be empty before you pass on your items to the next hopper!".
This clock has a period that is twice as much as a two-stroke clock, because each item has to be passed 4 times per cycle, rather than 2. A full load of 320 items will give a period of about 7.5 minutes.
This principle can be extended to longer chains of hoppers, with longer periods depending on the length of the chain.
Credit
The compact hopper clock was designed by YouTube user TitiSurMinecraft. Also, our two-stroke and rotary clocks are essentially the same as designs by Ethos and sethbling respectively, and their videos are always worth watching.

