Minecarts and Railroad Systems
Minecart railways &emdash; like redstone circuits &emdash; are a part of the game where technically-minded players can build mind-bogglingly impressive automated systems. It can all be rather daunting for the rest of us. Here are some pointers on how to use minecarts to get from A to B.Minecarts
There are several kinds of minecart. When you've built one, right-click on a rail tile to place it.Standard Minecart
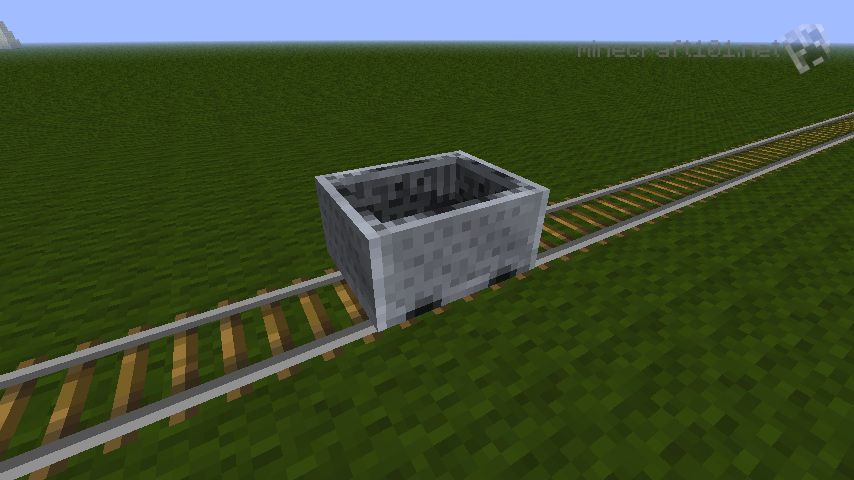
You (and other animals and monsters) can ride in these. Right-click to get in and out. You can push yourself along using the "forwards" key (W) and brake using "backwards" (D), but a slope or powered rail will get you moving much faster.
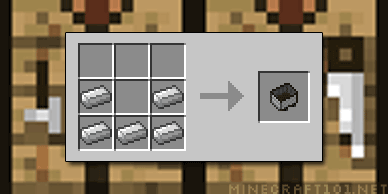
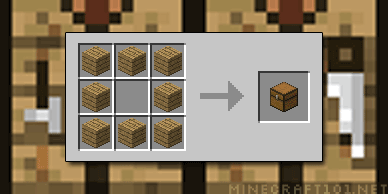
When you're done, you can hit it with a sword to pick it up again and carry it with you in your pocket. Minecarts are crafted from five iron ingots.
Minecart With Chest
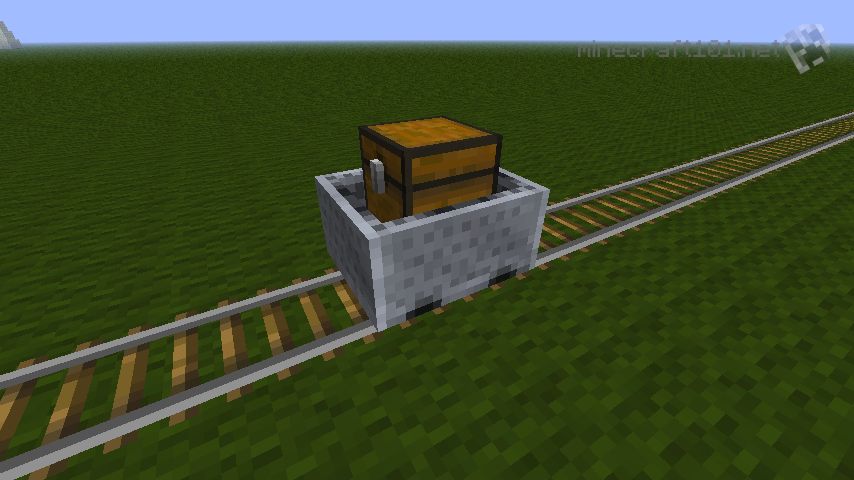
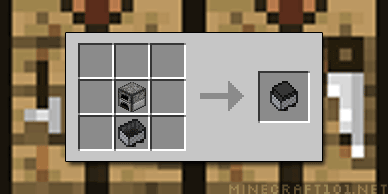
Also known in the game as "Storage Minecarts", these are made by combining a normal minecart with a chest. This kind of minecart can carry cargo. Right-click to access the container. These can be used in combination with powered minecarts for sending goods from your mine to your storeroom.
Minecart With Furnace

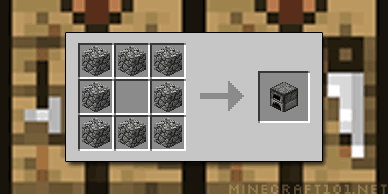
Also known as "Powered Minecarts". Build them by combining a normal minecart with a furnace. These can be set in motion by loading with fuel (right click whilst holding the fuel, eg. coal) and will then chug along pushing other carts ahead of them.
A powered minecart can usually push 4 other carts up a hill; for a longer train it might be worth adding a second powered cart.
Minecart Rails
There are three kinds of rail too:Normal Rail

Rails are placed by right-clicking on the floor where you want them to go. If you go around a corner or up or down a slope, the rails should adjust themselves automatically.
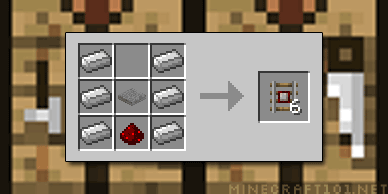
Powered Rail
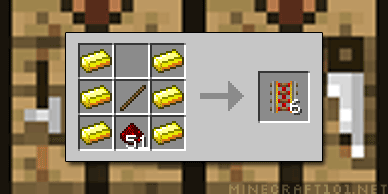
When unpowered, these act as brakes and will stop your cart. When powered by redstone, will give a minecart a push in the direction it is moving.
On flat ground
Moving minecarts will get a push in the direction they are going. Stationary minecarts will not get a push unless there is only one direction they can move (ie. they are right at the end of a track, up against a block.
On a slope
Moving carts will get a push in the direction they are going. Stationary carts will be given a push downhill.
Occupied minecarts (containing a player or a mob) will have travel up to 80 blocks on flat land after being boosted by a powerd rail; unoccupied carts, however, have less momentum and will only travel 8 blocks.
Detector Rail
Detector rails activate a redstone signal when a minecart passes over them.
Building a minecart rail system
Minecraft rail systems can be fabulously complicated and are fun to build, but here we'll just focus on simple systems to get you around your minecraft world with minimum fuss.
Materials
You will need lots of iron and wood to build your rails. You will also need gold and redstone for powered rails, unless you're OK with only going downhill.
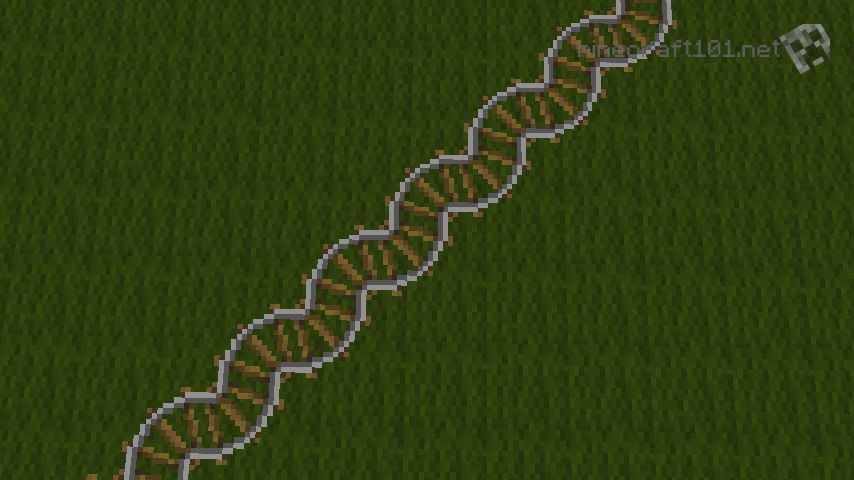
Laying Track
Just right click to lay tracks on the ground. Stick to level ground wherever possible. Rail can be laid diagonally in a zig-zag pattern; it looks wiggly on the ground but minecarts travel in a nice straight diagonal line. Place powered rails at appropriate intervals (see below). Provide power to the rails by placing a redstone torch or a lever next to the powered rail &emdash; you will see the rail light up. Redstone torches can also be placed underneath the block that the rail is resting on to provide a hidden power source.
How many powered rails to place?
Passenger Rail
An occupied minecart will be accelerated to maximum speed by three powered rails in a row. On flat ground, the cart will be kept up to speed by placing a powered rail every 38 blocks along the route. If you don't mind going slower and want to save on materials, powered rails can be placed further apart.
Cargo Rail
Although the Minecart With Chest looks like it should be good for building cargo trains to move stuff around, it should be noted that they only have the same momentum as an empty minecart, so you would need to place powered rails every 8 blocks. That's a lot of gold!
Climbing Hills
To keep up top speed whilst climbing a hill, you'll need one powered rail every two blocks; ie. alternate powered and normal rails. If you don't mind slowing down a bit, one powered rail every four blocks will do.
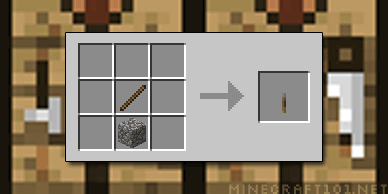
Stations
Building complex automated passenger stations with multiple destinations is a fun challenge, and there are many ingenious examples on YouTube and elsewhere. However, these simple stations will get you around your Minecraft world well enough! Both station designs are based on laying two pieces of powered rail into a small trench, and providing power using a stone button.
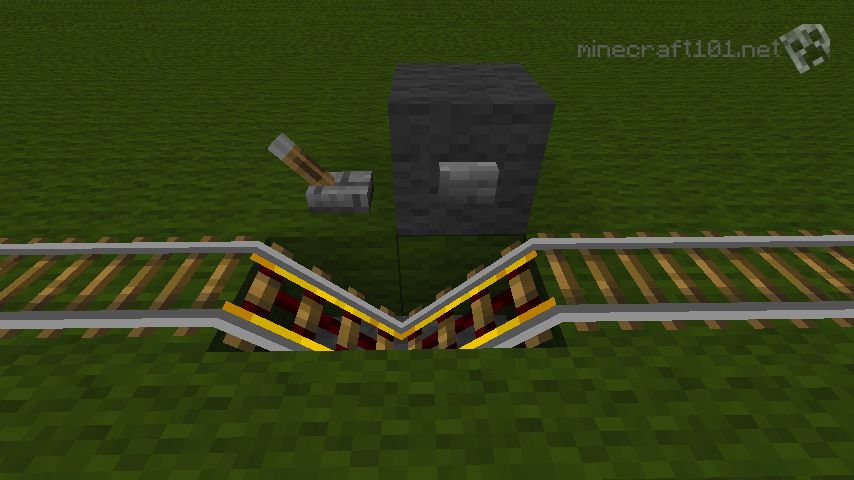
End station
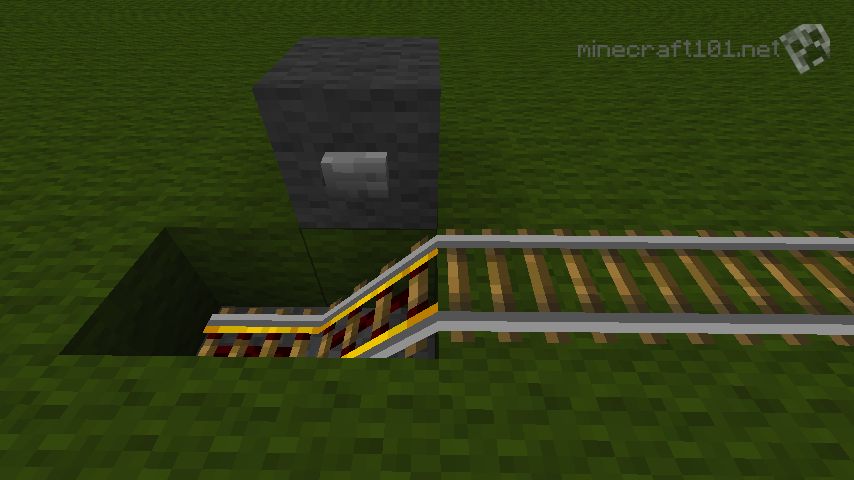
Place these at the ends of your line; place a cart in the hole, jump in and push the button to go!
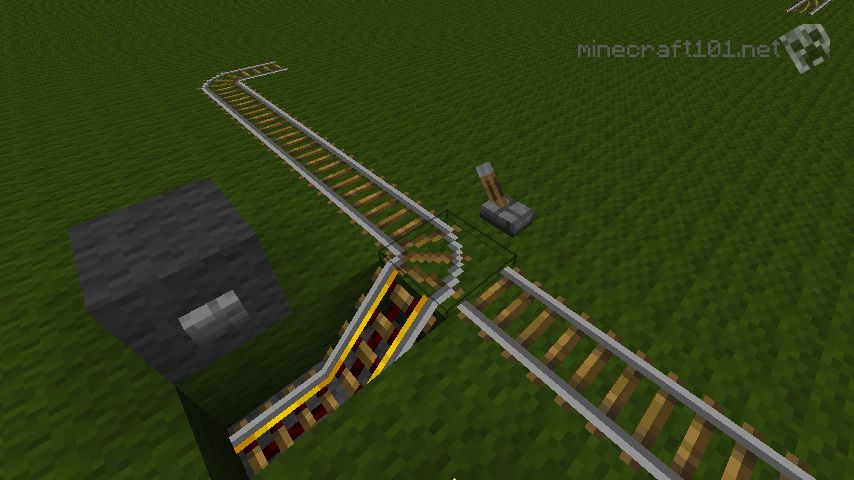
Waypoint station
These stations are ideal for points along your route where you may want to get in and out, or just push the button to keep going. To choose a direction, nudge the cart around so that it is on the slope that is downhill in the direction you want to go. The lever is an optional extra; you can use it switch the powered rails on permanently if you no longer want to stop at this station.
Switches and Junctions
When you place rails in a T-junction, the central rail will be bent into a right-angle 'elbow' connecting two of the tracks. A redstone signal (such as a redstone torch or a lever) will change the orientation of this elbow, allowing you to choose which way carts will go over the junction.
Here are some examples of how to take advantage of this as you start to build a more complex network:
2-way station
The lever allows you to select which direction your cart will set off in when you push the button.
3-way intersection
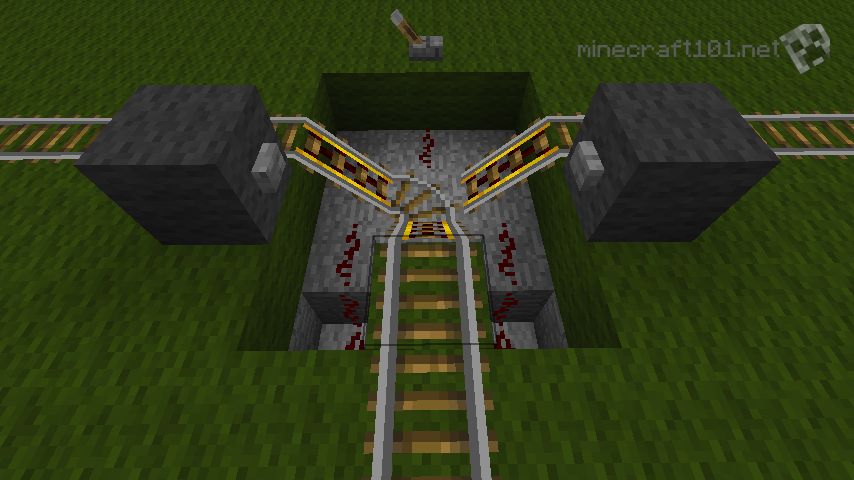

The lever controls the direction of the travel; push either button to go. Note how the buttons are connected to all the powered rails by a redstone wire that passes under one of the incoming tracks. To place redstone wire, right-click with redstone dust just like placing rails.
Links
There are a lot of very clever people out there designing complex rail systems. TaviRider and SethBling are just two of them; their YouTube channels are a great place to start looking for ideas when you want to build a really fancy transit network.