Mining
Mining is important! It’s in the name of game! You’ll be doing it a lot. It’s how you get the precious ores that you so desire: iron, gold, redstone and more, but most of all: diamonds!
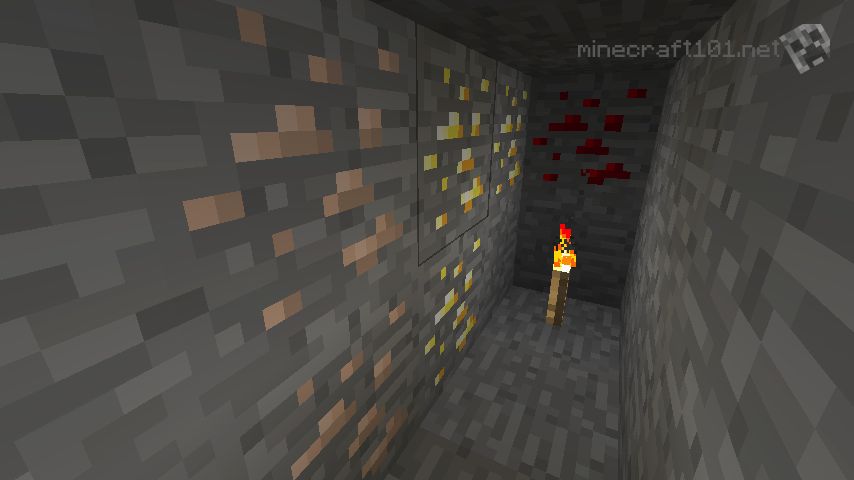
Buried Treasure
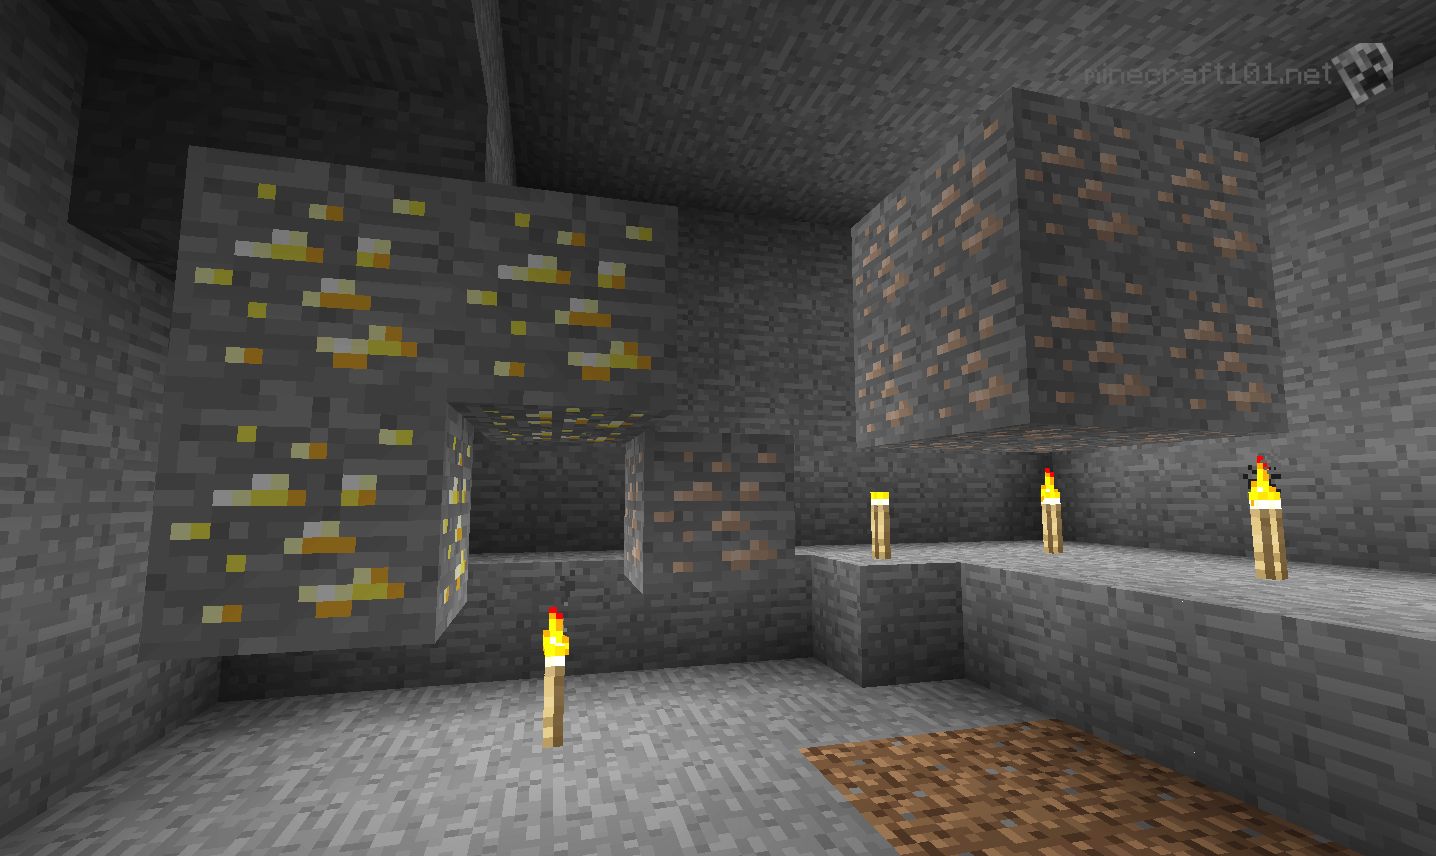
This is what we are after:
| Ore | Where to Look | Uses | |
|---|---|---|---|
| Coal | Anywhere underground, but most abundant below layer 40. | Torches, furnace fuel. | |
| Iron | Anywhere underground, but most abundant below layer 40. | Crafting tools and armour and building railways. | |
| Gold | Deep underground, below layer 30. | Crafting, brewing potions, powered rails. | |
| Redstone | Below layer 16. | Redstone circuits, crafting, potion brewing. | |
| Lapis lazuli | Below layer 30, most abundant near layer 12. | Decorative | |
| Emerald | Below layer 30, only in "extreme hill" terrain. | Trading with Villagers. | |
| Diamond | Below layer 16. | The best armour, tools and weapons. | |
| Nether Quartz | In the Nether. | Quartz blocks and daylight detectors. |
Where to dig?
As you can see from the table above, everything is available in layers 1&endash;16. You will want to get close to bedrock and build your mine there.
However, there may be other underground structures in the way, such as abandoned mineshafts, cave systems or even strongholds. These things might make your route to bedrock more difficult than described here, but you will want to explore them on the way down.
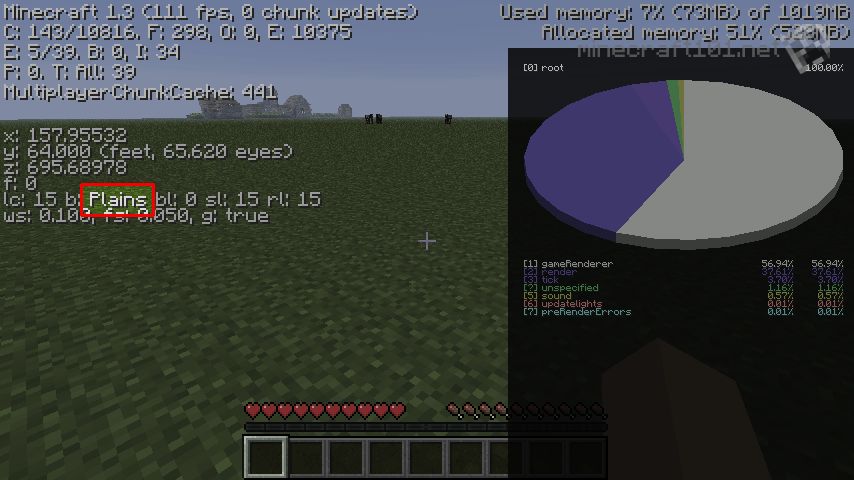
Emerald ore is only found in “Extreme Hill” and “Extreme Hill” biomes; you can tell what biome you are in by pressing F3. Emerald ore is also only found in single blocks, not veins, so you should build your tunnels closer together in your emerald mine.
Altitude and Layers
What’s all this about ‘layers’?
The Minecraft world is 128 blocks high, from the bedrock at the bottom to the highest position you’re allowed to place blocks. Sea level is about level 64.
What’s my altitude?
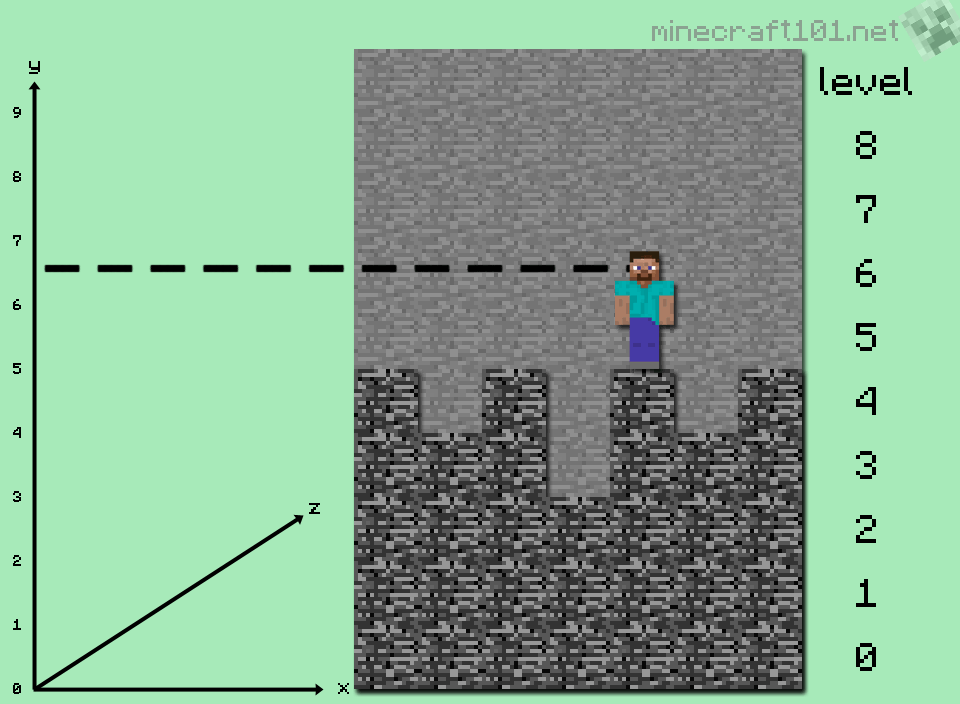
Bedrock is found in layers 0–4, therefore if you are standing on the highest level of bedrock, you are standing on layer 4.
Layer 4 has a mixture of bedrock and normal stone.
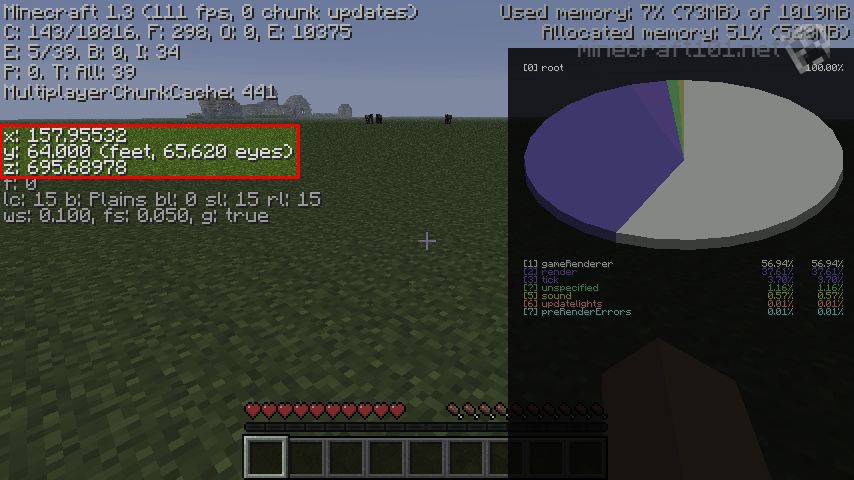
The other way to tell is to press F3 to bring up a messy screen of debug information, including your x,y and z coordinates. y is your height; the game reports both the level of your feet and your eye level, so if you are standing on top of layer 4 your feet will be at level 5 and your eye level will be 6.6.
Starting Your Mine
Start from somewhere low down, like a valley floor rather than the top of a mountain. You’ll want to start digging in a safe place; a well-lit building or sealed cave, because it will likely be night when you come back to the surface. Since you’ve probably already built a house, why not start in the basement?
At the head of your pit, you’ll want a crafting table, one or more furnaces, and some storage space.
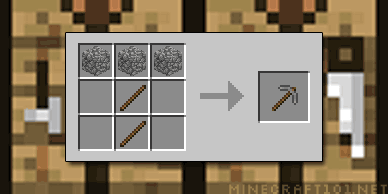
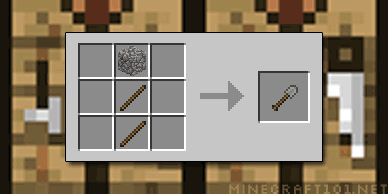
Equipment
At first, the only equipment you’ll need (or indeed, have) is a few stone pickaxes, a couple of shovels, a pile of torches, and wood to make more torches. You should be able obtain more than enough coal for your lighting needs as you go along, and will soon find iron to make better tools. A suit of armour and some weapons will be handy if you should break through into a cave or abandoned mineshaft.
Safety
Some precautions:
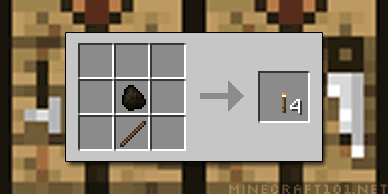
Torches, torches, torches
Hostile mobs spawn in the dark. You will need to light the tunnels you dig and any caves you explore. If you are running out of wood for torches, it’s time to quit mining and go cut down some trees!
Never dig straight down
Sooner or later you will dig away the block you’re standing on and find yourself plummeting into a lake of lava or a creeper convention. You might learn from this mistake. (It is possible to more safely dig a vertical shaft if it’s two blocks wide, and you correctly position yourself straddling the two blocks.)
Be careful if you dig straight up
If there is water or lava above the block you are about to dig, you should be able to see drips and know not to mine that block. Sand and gravel are also dangerous, however, as they can suffocate you and give you no such warning. Placing a ladder or sign at head level before digging upwards and it will stop anything nasty falling down.
Abandoned mineshafts, caves and dungeons
Often you will find that your mining leads you to one of these underground features. These places present their own dangers and are discussed on their own page.
Get Started
Dig a diagonal shaft, as deep as you can go. You will find minerals on the way; coal and iron at first. Use your shovel to clear gravel and dirt deposits. Place torches on the walls every 10 blocks as you go so monsters don’t spawn! ( More on lighting.)
You should find plenty of coal and iron ore on the way. When your pickaxes are worn out, or when you have a good amount of iron ore, you will want to return to the surface to smelt your iron and make better tools (and maybe iron armour).
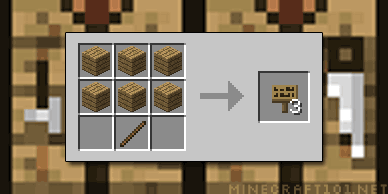
You will probably want to make stairs to make easier to get up and down the shaft.
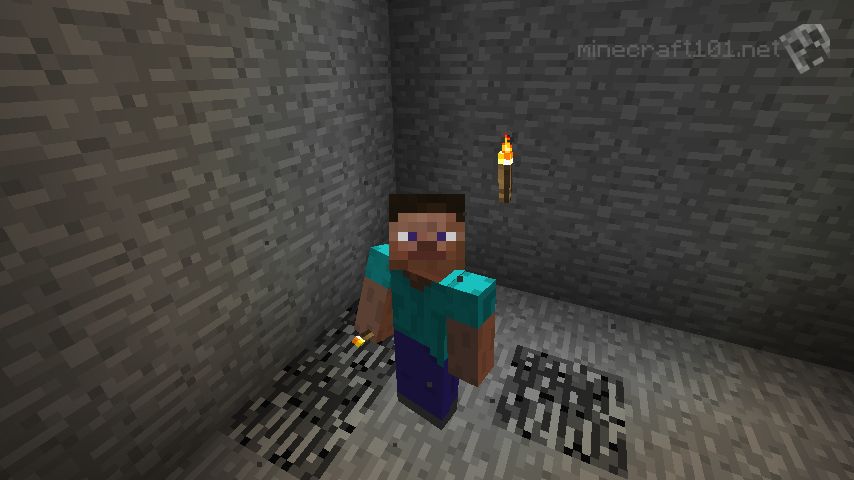
Hitting Bottom
Eventually, you will see bedrock, notice that there is a strange black fog, or press F3 and see your y coordinate approaching 6. This is the bottom!
You will probably want to build another base down here, with storage, furnaces, and maybe a food source and supply of wood.
Branch Mining
Now it’s time to find those diamonds! A branch mine is a long main corridor, with other tunnels going off to the sides, so that you have a good chance of finding all the diamonds in the area. Opinions differ on the best strategy, but here are some ideas.
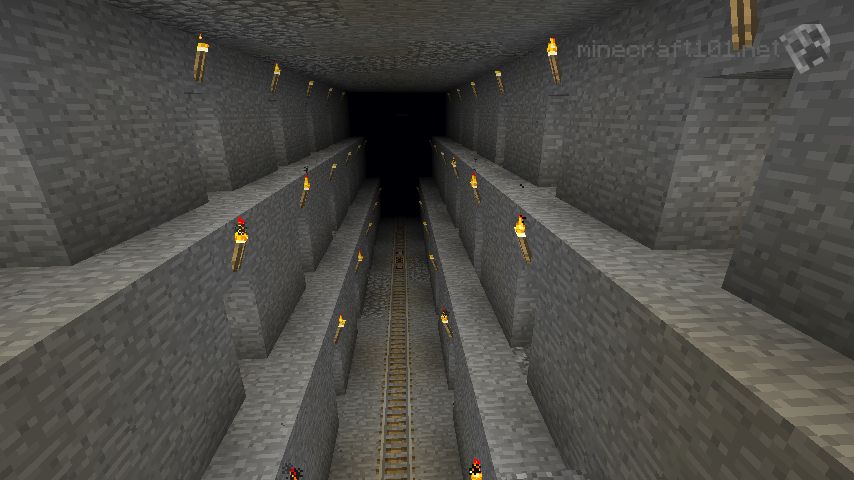
Main Corridor
I make a main corridor that’s quite wide, with a railway down the middle. You don’t need to be this ambitious, and it’s a lot of stone to dig out, but you get the idea.
Which layers to mine?
Diamonds are found only in the bottom 16 layers of the map, so this is where you will concentrate your mining.
There is a lot of lava in layers 5–10, including large lava-lakes. Some players prefer to avoid this by staying on layer 11 and above ( y=13.6 ). I prefer to mine at all levels, turning back when I hit lava, although it means many of my lower tunnels are short. Whichever you choose, you must be on constant alert for lava and be ready to run back down your tunnel at any time!
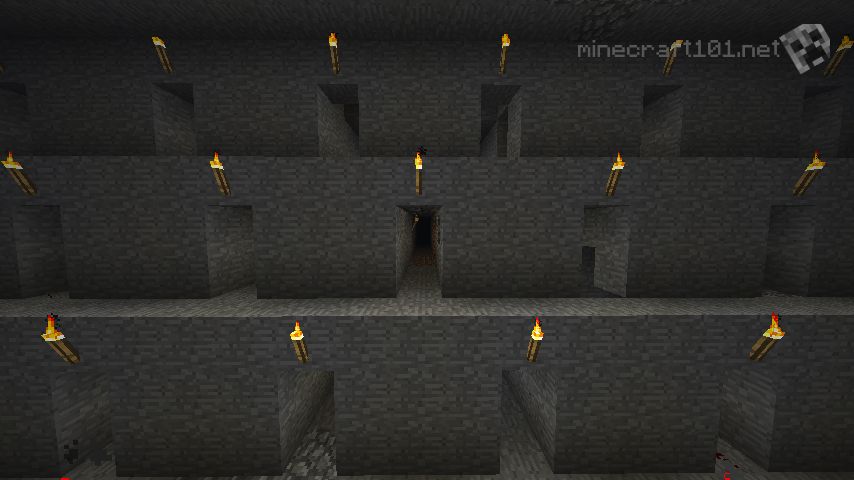
Side Branches
Efficient mining
What’s the best pattern for side branches? There are many different ideas on this front, but the goal is to find as much of the ore as possible whilst doing as little digging as possible.
Ores are usually found in veins or seams that are bigger than one block in all directions.
Most ores are found in veins of 3 or more blocks that extend 2 blocks in all directions. This means that if you dig your tunnels 3 blocks apart, you should be able to see any seam of ore from one side or the other.
Because diamonds are found in the bottom 16 layers, we want to search this volume as thoroughly as possible. You can cover most of it with three levels of branch tunnels, spaced 3 blocks apart.
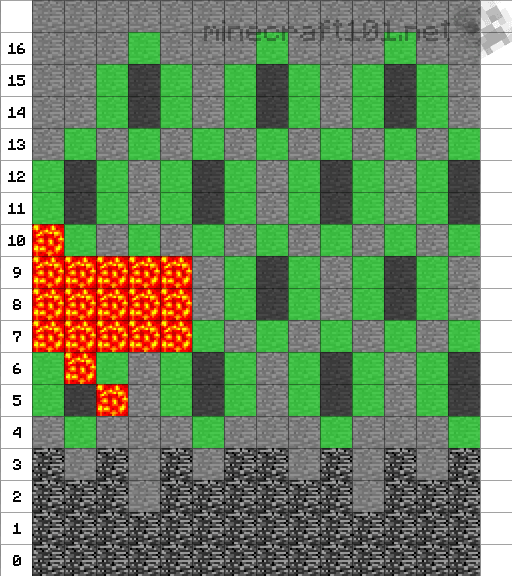
Branch-mining pattern. Side-tunnels have 3 horizontal blocks between them, and one vertical layer.
In the diagram above, black blocks are where you should dig the tunnels. Green blocks are the ones that you will be able to see directly. The light grey blocks are the ones you won’t see directly, but because ore seams are mostly bigger than one block, you will see some of the ore in the green blocks.
Mining with this pattern is very efficient, and you will miss only the smallest ore veins.
The exception to this is if you are mining for Emeralds in Extreme Hill biomes. Emerald ore is present as single blocks, so if you really want to get all the emeralds you have to place your tunnels 2 blocks apart.
Efficient pattern of side tunnels for branch mining.
Get Those Diamonds!
Dig each tunnel, looking out for ores along the way. Stop when you reach lava, or a cave system, or some other obstacle.
Remember to place torches every 10–12 blocks!